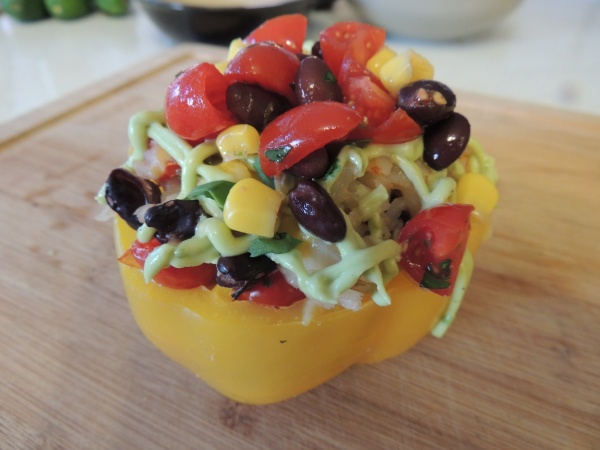
Mouthwatering Mediterranean Burgers and Zucchini Chips

Mouthwatering Mediterranean Burger and Zucchini Chips, Photo Credit: Accounting for Taste

Mouthwatering Mediterranean Burger and Zucchini Chips, Photo Credit: Accounting for Taste


Tzatziki. Mint. Feta. (Swoon.)  Tonight’s meal was a fantastic last-minute concoction.  It was “burger night” in the AFT household and as I was driving home from work the beau called me to ask if I would pretty please stop by the grocery store and buy him some cheddar cheese.  Apparently, all we had in the fridge was goat cheese, mozzarella, and feta.  That last one caught my attention.  Feta? Oh yeah… I could go for some feta on my burger. Or… IN my burger. With… onion… aaaaand… mint? Yes, mint. Oh man, this is getting exciting.  I happily dreamed up my burger as I made my way to the grocery store.  A dollop of tzatziki, a spoonful of diced cucumber and tomato, and a “schmear” of some Sriracha greek yogurt should finish things off nicely.

And every good burger needs a worthy sidekick. Last night I made sweet potato oven fries, so fries were out of the question.  I mentally sorted through a few healthy side dish options and decided on zucchini “chips”.  Faux fried dishes are a dieter’s best friend, let me tell you.  All the “yum” and none of the guilt? Sign. Me. Up.  (With last night’s sweet potato fries I made faux fried chicken tenders!)

Ingredients

For the burger:

  • 1 lb. ground beef (90% lean, 10% fat)
  • 1 Tbsp. seasoning salt
  • 1 Tbsp. coarse ground garlic powder (feel free to tweak this amount to suit your taste)
  • 1/3 c. finely chopped red onion
  • 2 Tbsp. crumbled feta cheese
  • 2 Tbsp. thinly sliced fresh mint leaves

For the tzatziki sauce, combine the following ingredients in a bowl:

  • 1/2 c. plain 2% greek yogurt
  • 1 tsp. minced garlic
  • 2 tsp. lemon juice
  • 2 Tbsp. seeded and diced cucumber

For the Sriracha greek yogurt, combine the following ingredients in a bowl:

  • 1/2 c. plain 2% greek yogurt
  • 1 Tbsp. Sriracha hot sauce
  • 1 tsp. lemon juice

For the tomato and diced cucumber “salad” topping, combine the following ingredient in a small bowl:

  • 1/2 c. diced cucumber
  • 1/2 c. diced tomato

For the zucchini chips:

  • 1 zucchini
  • 2 eggs
  • 2 cups panko breadcrumbs

Directions

After you prep the tzatziki and Sriracha greek yogurt sauces, you’ll want to start your zucchini chips.  They need to bake for about 20 minutes which is all the time you’ll need to prep and cook your burgers.

For the zucchini chips:

  1. Preheat the oven to 425 degrees and prep your breading station.  To do this, first crack 2 eggs into a bowl and scramble with a fork.  Then pour 2 cups of panko breadcrumbs onto a paper plate.  Line a baking pan with a wire rack and coat the wire rack with cooking spray to prevent the zucchini from sticking.
  2. Cut the ends off the zucchini.  Using a mandolin, or cutting them by hand, slice the zucchini into thin, round “chips”.
  3. Dip the zucchini rounds into the egg and then coat them with panko breadcrumbs and place them on the wire rack.  Be sure to spread the zucchini out evenly, as you don’t want them on top of each other when they’re cooking or they won’t crispy nicely.
  4. Lightly spray the tops of the zucchini chips with non-stick cooking spray, which will help the panko to brown in the oven. Season with salt and pepper and bake at 425 for 20 minutes.

For the burger:

  1. Combine all burger ingredients in a bowl. Mix well. Form into patties, depending on how big or small you like your burgers. You can make (2) 1/2 lb. burgers or (4) 1/4 lb. burgers.
  2. Heat a saute pan on high heat.  This will give your burgers a nice sear when you first place them in the pan.  Once you add your burgers to the pan, immediately reduce the head to medium.  Cook to the desired level of doneness. I’m a medium-rare kinda girl, myself, so I cooked my burgers for about 2-3 minutes on each side and then set them aside on my cutting board to rest for a few minutes.  When you allow your meat to sit and rest after cooking (as opposed to immediately cutting right into it) you help keep the delicious juices in your meat.  Also, as the meat sits and rest it will continue to cook just a bit more courtesy of residual heat.

Now, build your burger! Toast your bun if you’d like (I like.).  Spoon a dollop of tzatziki sauce on top of the burger and about 1 Tbsp. or so of the tomato and cucumber salad on top of the tzatziki.  Spread some of the Sriracha greek yogurt on the top bun and top off your masterpiece of a burger.  Ta da! Sink your teeth in and appreciate the feta, mint, and onion mixed into the burger.  Savor the cucumber-garlic-lemony tang of the tzatziki and the cool burn of the Sriracha greek yogurt.  Is this what heaven tastes like?  Probably.

Faux “Fried” Chicken Tenders and Sweet Potato Fries

Faux "Fried" Chicken Tenders with Sweet Potato Fries

Faux “Fried” Chicken Tenders and Sweet Potato Fries, Photo Credit: Accounting for Taste

Friends, meet the guilt-free version of chicken fingers french fries!  And it’s SO delicious – it’s sure to please both your inner child and your actual children. 🙂

Ingredients

For the chicken tenders:

  • 1- 1 1/2 lb. chicken breast tenderloins
  • 2 c. cornflake breadcrumbs (you can substitute panko breadcrumbs or even make a 1/2 cornflake and 1/2 panko breadcrumb mixture)
  • 2 c. flour
  • 2 eggs

For the sweet potato fries:

  • 2 large sweet potatoes
  • 1/4 c. olive oil
  • 3 Tbsp. cornstarch
  • 1 Tbsp. salt
  • 1 Tbsp. cinnamon
  • 1 tsp. pepper
  • 1 tsp. cumin
  • 1 tsp. chili powder

Directions

You’ll want to make the sweet potato fries first because they take longer to cook.

  1. Preheat the oven to 425 degrees.
  2. Peel and cut the potatoes into french fry shapes pieces. Place in a large bowl and toss with olive oil.
  3. Sprinkle the cornstarch, salt, cinnamon, pepper, cumin, and chili powder on the fries and toss again to coat.
  4. Like a baking sheet with parchment paper and place the fries onto the baking sheet. Try to spread them out as much as possible. I wound up using two different baking sheets to fit all of the fries without crowding them. (Crowding them will cause them to steam as opposed to bake and get nice and crispy.)
  5. Bake in the oven for 30 minutes.

Once you pop the fries in the oven you can get started on the chicken tenders.  While the fries need about 30 minutes to cook, the chicken tenders only need to bake for around 15-2o minutes. This will work out perfectly because it only takes about 10 minutes to bread the chicken tenders.  So just as the french fry timer is down to “20 minutes” you’ll be popping the chicken tenders in the oven anyway! And everything will finish cooking at the same time! Hooray for great time management!

To make the chicken tenders:

  1. Set up your “breading station”.  You’ll want one plate with flour on it, a bowl with your (cracked and scrambled) raw eggs, and a plate with your breadcrumbs on it.
  2. Bread each chicken tender by first dredging it in the flour, then dipping it in the egg, and lastly coating it with the breadcrumbs.
  3. Line a baking pan with a wire rack. Coat the rack with a non-stick cooking spray. Place the breaded chicken tenders on the rack.
  4. Season the chicken tenders with salt and pepper. Place in the oven (which is already on at 425 degrees because the fries are in there baking) and bake the chicken tenders for 15-20 minutes.
  5. Service with dipping sauce of choice. Enjoy!

Quick dipping sauce idea: Honey Mustard (1/4 c. dijon mustard + 1/4 c. honey. BOOM.)

Zucchini “Pasta” with Turkey Sausage Bolognese

I would like to give one very enthusiastic high five to the person who first figured out that you could shred certain vegetables into long skinny “noodles” and serve them as a pasta substitute. One cup of cooked spaghetti noodles is about 200 calories. One cup of cooked zucchini – depending on how you make it – can weigh in at about 60 calories. That’s 70% less calories! Ho-ly cow, my friend. My waistline is forever in your debt!

Using turkey sausage instead of a pork-based sausage also helps save on the fat and calorie content of this dish. There is no butter whatsoever and only 3-4 Tbsp. of olive oil went into sautéing the zucchini pasta.

Ingredients:

  • 1 lb. ground Italian Turkey Sausage (hot or mild, your preference)
  • 2 carrots
  • 2 stalks of celery
  • 1 small onion (about 1 c chopped)
  • ½ c. white wine
  • 1 Tbsp. minced garlic
  • 1 large can (28 oz.) of chopped tomatoes with puree
  • Salt and pepper (for seasoning)
  • 2 Tbsp. Italian herbs (any dried Italian herbs that you’ve got on hand – basil, oregano, rosemary, etc. I used the one that I have from the grocery store which is an “Italian herb blend”.
  • Grated Parmigiano Reggiano cheese, to garnish. (optional)
  • Crushed red pepper, to garnish. (optional)
  • Zucchini “pasta” (see recipe here)

Directions:

  • Heat a sauté pan over medium high heat and cook the sausage until almost completely cooked through. Drain any excess fat (if necessary) and set aside in a bowl.
  • If you have a food processor, roughly chop the carrots, celery, and onion into large chunks.  Add to the food processor and use the “chop” function for about 10 seconds, or until everything has been cut down into tiny bits (the equivalent of a “fine dice”).  If you do not have a food processor, dice the carrots, celery, and onion into small, small, pieces.  Think “minced”.
Zucchini Pasta with Turkey Sausage Bolognese, Photo Credit: Accounting for Taste

Zucchini Pasta with Turkey Sausage Bolognese, Photo Credit: Accounting for Taste

  • In the same sauté pan that you prepared the sausage, reduce the heat to medium. Add the onion, carrots, and celery. Season with salt and pepper. Cook over medium heat until they begin to soften (about 5 minutes).
  • Add the 1/2 c. of white wine to the pan. Quickly, begin to scrape the bottom of the pan, loosening any of the brown bits that have begun for form on the bottom. (This process of adding a bit of liquid to a hot pan and scraping the brown bits from the bottom is called “deglazing the pan”. The brown bits are where much of the tasty flavor comes from and so it’s important to scrape them from the bottom of the pan so they can be incorporated into the dish!)
  • Add the garlic to the pan and stir to incorporate. After about 30 seconds, add the cooked Italian sausage back to the pan and immediately add the can of crushed tomatoes and the Italian herbs to the pan as well. Stir everything and reduce the heat so that you being the sauce to a very slow simmer.
Zucchini Pasta with Turkey Sausage Bolognese, Photo Credit: Accounting for Taste

Zucchini Pasta with Turkey Sausage Bolognese, Photo Credit: Accounting for Taste

  • Simmer for at least 15 minutes before serving. I let mine simmer for over an hour (while I watched some Netflix) so the flavors could really meld.
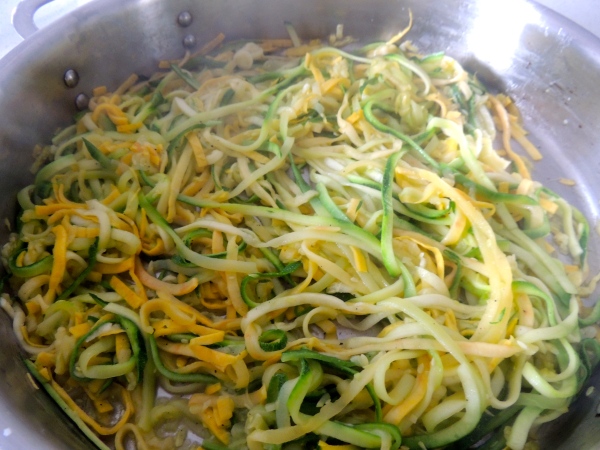
  • While the sauce is simmering, go ahead and prepare your zucchini pasta. It cooks quickly so if you’ve already cut your zucchini ribbons you’ll only need about 5 minutes to cook it.
  • Plate your zucchini pasta in a bowl, ladle the Bolognese sauce on top, and garnish with some grated Parmigiano Reggiano cheese and crushed red pepper.
Zucchini Pasta with Turkey Sausage Bolognese, Photo Credit: Accounting for Taste

Zucchini Pasta with Turkey Sausage Bolognese, Photo Credit: Accounting for Taste

Zucchini “Pasta”

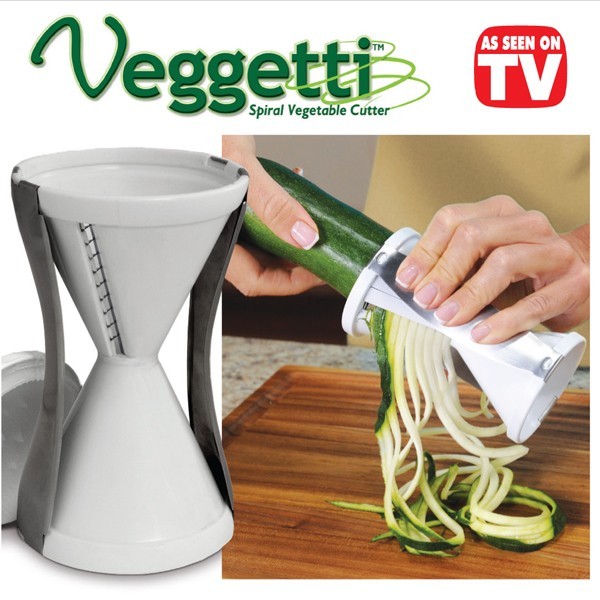
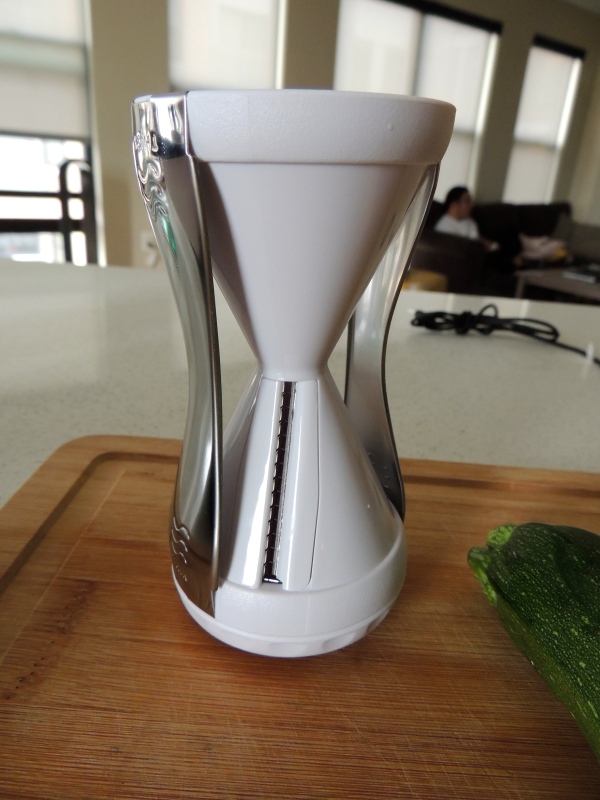
When making zucchini pasta, you’ll want to have 1 to 2 zucchinis per person.  You’ll also need the proper tools.  You can use a vegetable spiralizer to cut your zucchini or one of these bad boys:

Veggetti Vegetable Slicer

Veggetti Vegetable Slicer


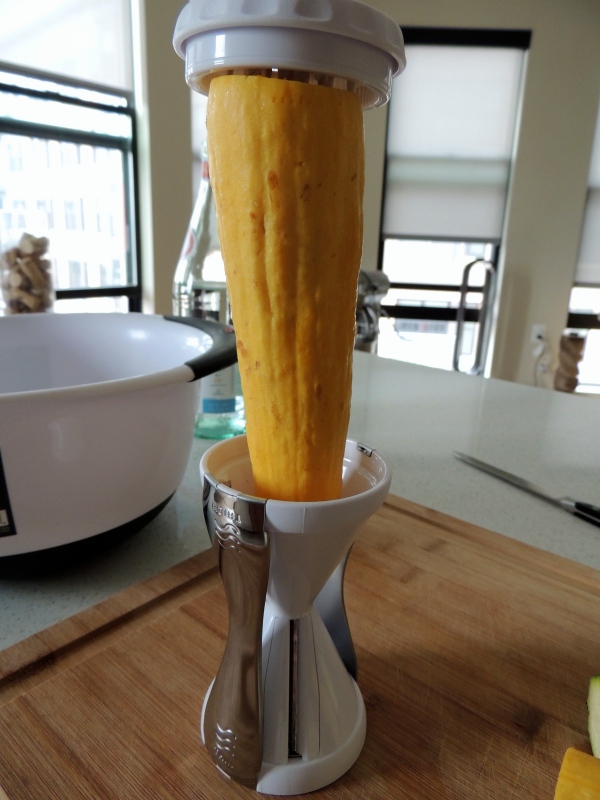
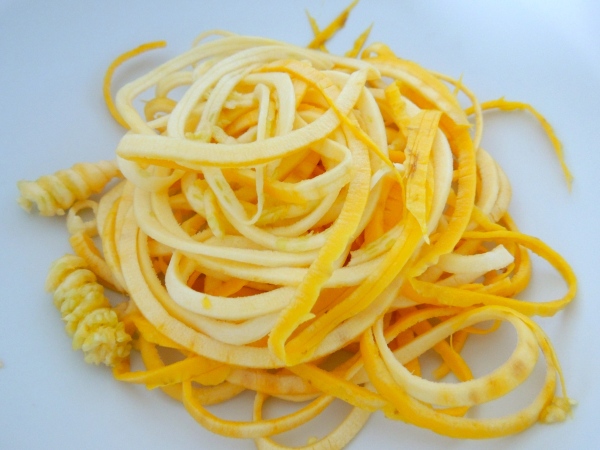
The gadget does all the work!  It’s as easy as the following:

1. Rinse and dry your zucchini. (I used both zucchini and yellow squash.)

Photo Credit: Accounting for Taste

Photo Credit: Accounting for Taste

2. Cut off both ends of each zucchini.

Photo Credit: Accounting for Taste

Photo Credit: Accounting for Taste

3. Use the Veggetti or spiralizer as directed to create your veggie spaghetti “noodles”.

Photo Credit: Accounting for Taste

Photo Credit: Accounting for Taste

Photo Credit: Accounting for Taste

Photo Credit: Accounting for Taste

Photo Credit: Accounting for Taste

Photo Credit: Accounting for Taste

Photo Credit: Accounting for Taste

Photo Credit: Accounting for Taste

Photo Credit: Accounting for Taste

Photo Credit: Accounting for Taste

Photo Credit: Accounting for Taste

Photo Credit: Accounting for Taste

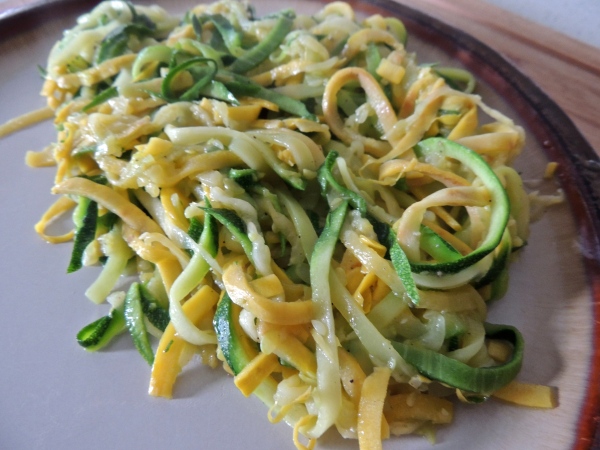
4. To cook, heat a sauté pan over medium high heat.  Add 2-3 Tbsp. of olive oil. Sauté 5-6 minutes or until zucchini softens. Season with salt and pepper.

Photo Credit: Accounting for Taste

Photo Credit: Accounting for Taste

Photo Credit: Accounting for Taste

Photo Credit: Accounting for Taste

Photo Credit: Accounting for Taste

Photo Credit: Accounting for Taste

Voila! It’s THAT easy.  You can also steam or boil the zucchini if you’d prefer.

Sausage and Peppers Stuffed Zucchini Boats

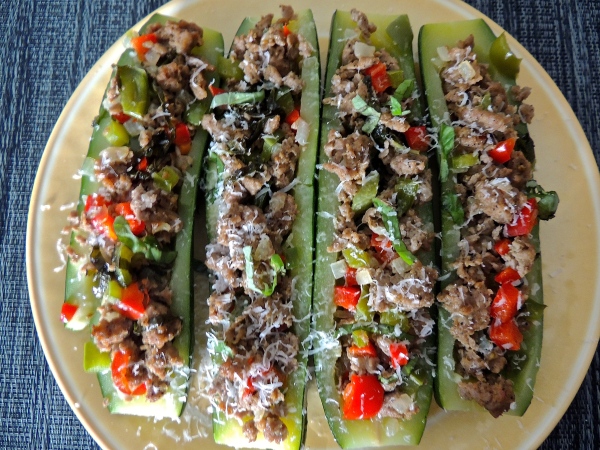
There’s a great meat purveyor at our local farmer’s market that we’ve been buying our meat from for the past few weeks.  We’ve bought all kinds of goodies from them so far like beef cheek, rabbit, and lamb lollipops.  This week we bought some of their spicy Italian turkey sausage.   The first thing that pops into my brain when I think “sausage” is always sausage and peppers! (Blame it on the Italian genes.)  Making sausage and peppers hoagies or sausage and peppers pasta would be a little on the carb-heavy side.  Therefore, I decided that it would be both fun and healthy to stuff some zucchini!

Sausage and Peppers Stuffed Zucchini, Photo Credit: Accounting for Taste

Sausage and Peppers Stuffed Zucchini, Photo Credit: Accounting for Taste

Ingredients

  • 2 large zucchini
  • 1/2 lb. turkey sausage
  • 1/2 red bell pepper, diced
  • 1/2 green bell pepper, diced
  • 1/2 small yellow onion, diced
  • 1/4 c. fresh basil, thinly sliced
  • 2 Tbsp. olive oil
  • salt and pepper (to taste)
  • crushed red pepper (optional)
  • 1/4 c. parmigiano-reggiano cheese (optional)

Directions

1. Preheat your oven to 400 degrees.  Heat a medium sauté pan to medium-high heat. Add the olive oil and sausage to the pan.

2. After 2 or 3 minutes, add the diced onion to the pan along with the sausage.  Cook until the onion is soft and the sausage has begun to brown and is cooked most of the way through. The sausage will finish cooking in the oven.  (That being said – feel free to cook it all the way through in the sauté pan if you are more comfortable with that.)

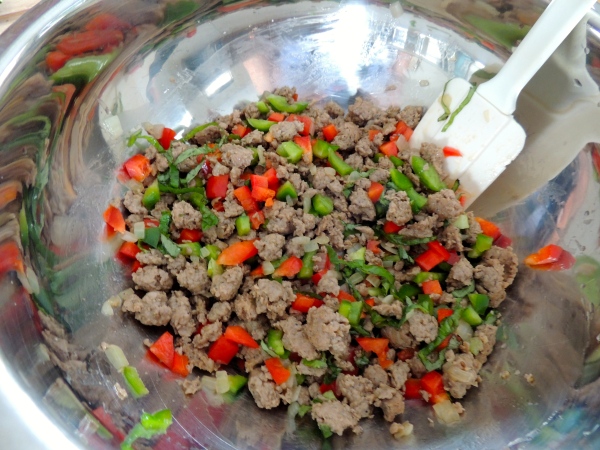
3. Place the cooked sausage and onion mixture in a bowl.  Stir in the diced red and green bell pepper and set aside. Season this mixture with salt and pepper. Add 1/2 tsp. or so of crushed red pepper, if desired.

Sausage and Peppers Stuffed Zucchini, Photo Credit: Accounting for Taste

Sausage and Peppers Stuffed Zucchini, Photo Credit: Accounting for Taste

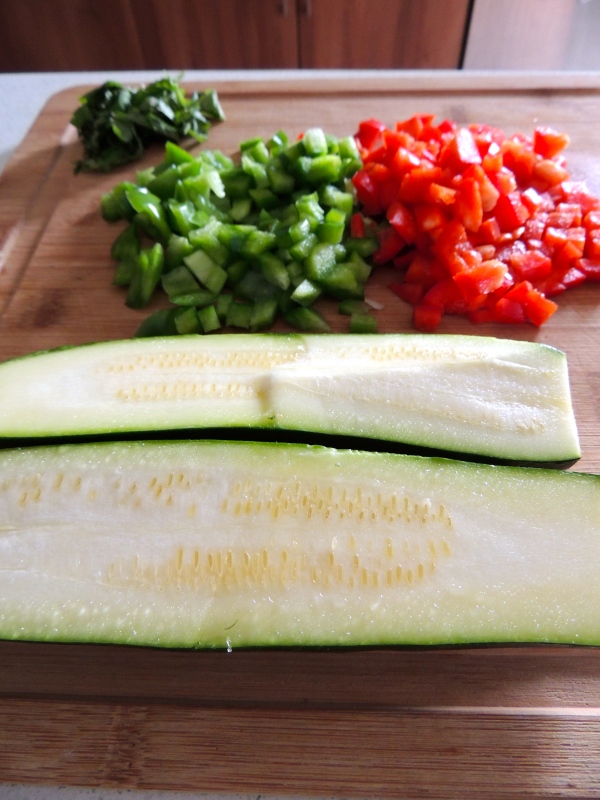
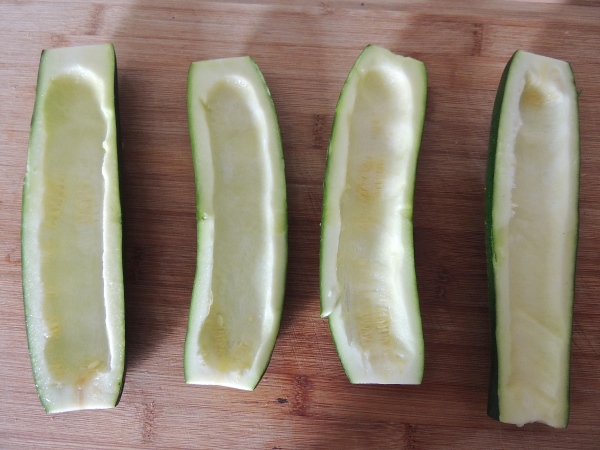
4. Cut the zucchini in half, lengthwise.  Using a small spoon or melon baller, remove the meat from the middle of each zucchini, leave a border of around 1/2 inch or so.  Make sure not to dig the core too deeply, as you don’t want a hole in the bottom of your zucchini boat!  Season each zucchini boat with some salt and pepper (you can be a little generous with the salt, as the zucchini will release a lot of water as it steams in the oven and you will lose some of the salt to the released water.)

Sausage and Peppers Stuffed Zucchini, Photo Credit: Accounting for Taste

Sausage and Peppers Stuffed Zucchini, Photo Credit: Accounting for Taste

5. Spoon the sausage/onion/peppers mixture into each zucchini boat, filling each zucchini as much as possible.  In a 9×13 baking dish (or an 8×8 if you have it, as the zucchini will most likely fit nicely in this smaller pan) add just enough water to barely cover the bottom of the pan. (Note: if you have some on hand, you can also substitute chicken broth for the water.)

Sausage and Peppers Stuffed Zucchini, Photo Credit: Accounting for Taste

Sausage and Peppers Stuffed Zucchini, Photo Credit: Accounting for Taste

6. Place the zucchini into the baking dish and cover with foil.  Bake at 400 degrees for 30 to 40 minutes, or until the zucchini are cooked through.

7. Remove the zucchini from the oven and allow to cool for a few minutes.  Sprinkle with some grated parmigiano-reggiano cheese, if desired.

Sausage and Peppers Stuffed Zucchini, Photo Credit: Accounting for Taste

Sausage and Peppers Stuffed Zucchini, Photo Credit: Accounting for Taste

Sausage and Peppers Stuffed Zucchini, Photo Credit: Accounting for Taste

Sausage and Peppers Stuffed Zucchini, Photo Credit: Accounting for Taste

Quick Dill Pickles

It’s summertime and farmer’s markets are popping up everywhere.  I love farmer’s markets because they’re great exposure to veggies and other produce you might not normally see in the grocery store (I’m talking to you, weird-looking squash.).  Enter: pickling cucumbers.  When I first saw them, I naively thought “Aww, look – little baby cucumbers! How adorable!” Then I saw the sign, “Pickling Cucumbers: $2.oo/lb.” and I knew what had to be done: homemade pickle experiment.

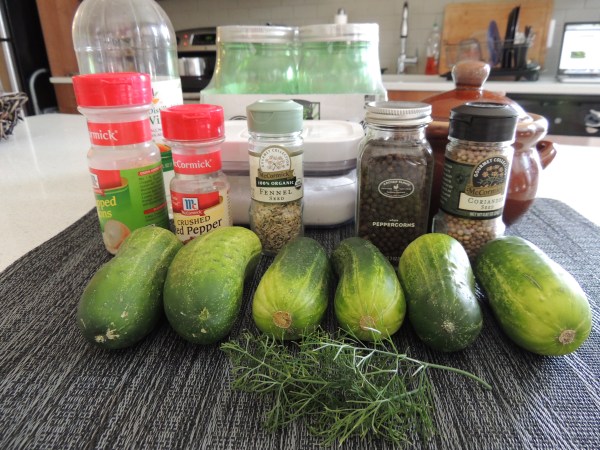
I started scouring the internet for articles on how to make pickles at home and let me tell you – there are a TON of different recipes out there.  However, the basic formula is the same: pickling liquid + herbs and spices + cucumbers.  So, I grabbed all the spices in my arsenal and started sniffing around, deciding which ones I would want to flavor my pickles with. Most folks seem to be partial towards one particular pickle flavor. I’m a dill pickle kinda girl, myself.  So I decided to go with some of the basics: black peppercorn, coriander, garlic, and dill.  I also decided to add a pinch of fennel seed and crushed red pepper because… well because why not, I suppose?  This is just my first pickle experiment, after all.  Eventually I’ll figure out what works for my palette and what doesn’t.

Below is the recipe I used (but feel free to add or subtract herbs and spices, as you see fit). Happy pickling!

Quick Dill Pickles, Photo Credit: Accounting for Taste

Quick Dill Pickles, Photo Credit: Accounting for Taste

Ingredients

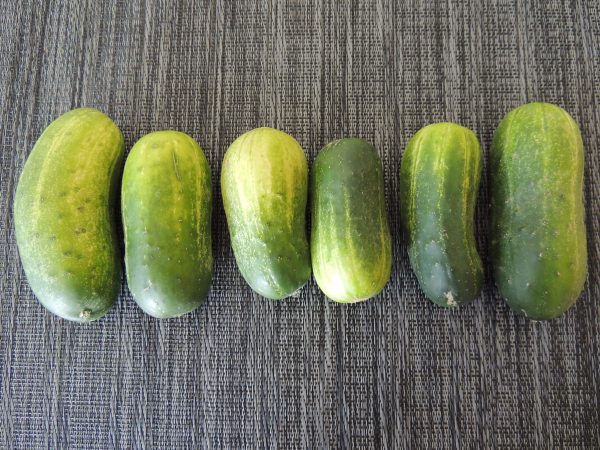
6-8 Kirby cucumbers

3 c. water

3 c. distilled white vinegar

2 Tbsp. kosher salt

2/3 c. sugar

2 tsp. black peppercorns, divided

2 tsp. coriander seed, divided

1 tsp. fennel seed, divided

1 tsp. onion flakes, divided

1 tsp. red pepper flake, divided (optional)

4 Tbsp. fresh dill, divided (I actually just cut a small handful of dill sprigs from my potted dill plant. However, if I had chopped it up it probably would have been about 4 Tbsp.)

4 garlic cloves, cut in half lengthwise

2 large mason jars

Directions

Quick Dill Pickles, Photo Credit: Accounting for Taste

Quick Dill Pickles, Photo Credit: Accounting for Taste

1.  Rinse off your cucumbers and set aside to dry.

Quick Dill Pickles, Photo Credit: Accounting for Taste

Quick Dill Pickles, Photo Credit: Accounting for Taste

2.  Add water, vinegar, salt, and sugar to a pan and bring to a boil. Then, let simmer for 15 minutes. This is your “pickling brine”.

Quick Dill Pickles, Photo Credit: Accounting for Taste

Quick Dill Pickles, Photo Credit: Accounting for Taste

3. While your pickling brine simmers on the stove, add the black peppercorns, coriander seed, fennel seed, onion flakes, red pepper flakes, dill, and garlic cloves to your two mason jars, dividing the ingredients equally between the two jars.

Quick Dill Pickles, Photo Credit: Accounting for Taste

Quick Dill Pickles, Photo Credit: Accounting for Taste

4. Slice the ends off of each cucumber. Then slice each cucumber in half, lengthwise.  Divide the sliced cucumbers equally between the two jars.

Quick Dill Pickles, Photo Credit: Accounting for Taste

Quick Dill Pickles, Photo Credit: Accounting for Taste

5.  Pour the pickling brine into each jar, making sure there is enough liquid to cover the cucumbers. Wait a minute or two and then close the jar lids.  Allow the jars to sit and cool down to room temperature before putting the jars in the refrigerator.

Quick Dill Pickles, Photo Credit: Accounting for Taste

Quick Dill Pickles, Photo Credit: Accounting for Taste

6. Refrigerate for about 24 hours before eating.  This will give the flavors a chance to really meld.  The pickles should keep for about a month.  That being said, if anything starts to taste off or “funky” about them, it’s probably a good idea to just go ahead and get rid of them.


Greek Chicken with Tomato, Zucchini, and Artichokes

I think I mentioned a few posts ago that I’ve been on a Mediterranean kick lately.  I love all the salty flavors in this dish: kalamata olives, artichoke hearts, and feta cheese.  It’s light, it’s fresh, and it’s a quick meal to throw together any night of the week.  Health perk: it’s just chicken and veggies!  No rice, pasta, or potatoes, so it’s calorie-friendly. There’s not even any butter in the dish – it’s all flavor and no guilt!  Here’s how to make it:
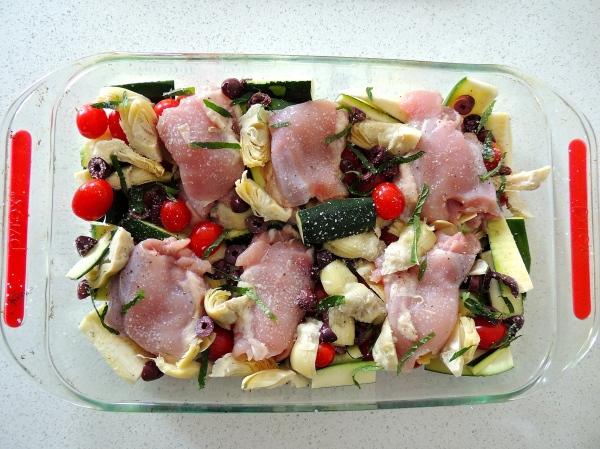
Greek Chicken with Tomatoes, Zucchini, and Artichokes. Photo Credit: Accounting for Taste

Greek Chicken with Tomatoes, Zucchini, and Artichokes. Photo Credit: Accounting for Taste

Ingredients:

  • 1 lb. boneless, skinless chicken thighs
  • 2 zucchini (medium to large)
  • 1 can quartered artichoke hearts, drained
  • 2 cups of grape tomatoes (roughly)
  • 1/2 c. kalamata olives, chopped
  • 1/2 of a lemon
  • 8 – 10 mint leaves, finely chopped
  • 4-5 Tbsp. olive oil (divided)
  • salt and pepper
  • Feta cheese (to garnish)

Directions:

  1. Preheat oven to 375 degrees.  While the oven preheats, drizzle 2-3 Tbsp. of olive oil in the bottom of a 9×13 pan and set aside.
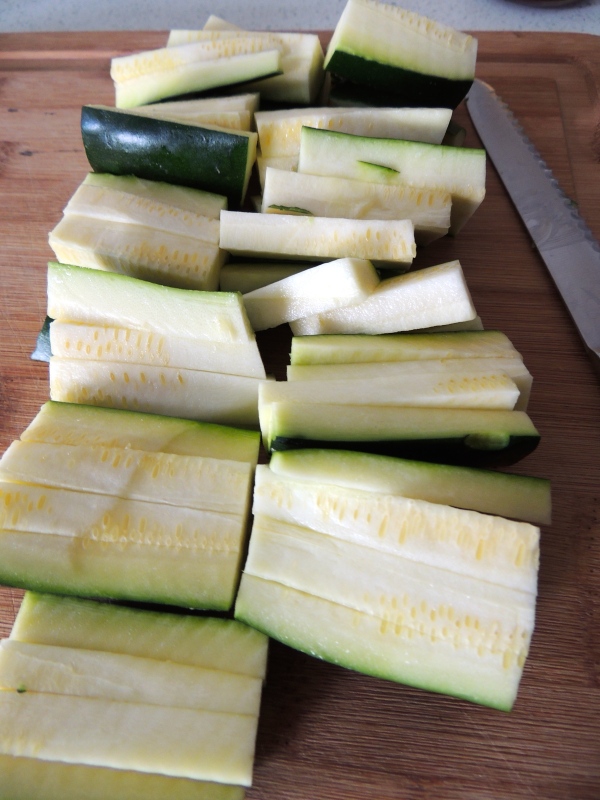
  2. Chop the zucchini as desired, really.  I cut mine into about 3-inch long sticks but you can just as easily cut the zucchini any way you prefer to eat it. Add the zucchini to the 9×13 pan.
  3. Add the tomatoes, artichoke hearts, and kalamata olives to the 9×13 pan as well.
  4. Nestle the chicken thighs into the 9×13 pan, amongst the veggies.  Season everything with some salt and pepper.
  5. Drizzle 2-3 Tbsp. of olive oil on top of the chicken and veggies in the pan.  Sprinkle the chopped mint leaves on top of everything.
  6. Squeeze the juice of half a lemon over the entire mixture in the pan.  Bake for 40-45 minutes, or until chicken is cooked through.
  7. Remove the pan from the oven and allow to cool for 4-5 minutes.  Plate each serving and sprinkle with feta to garnish. Serve immediately.
My chopped zucchini (if you're interested.)

My chopped zucchini (if you’re interested.)

All of the ingredients, nice and nestled in the pan.

All of the ingredients, nice and nestled in the pan.

All of the ingredients, nice and nestled in the pan.

The finished product!


The finished product. Enjoy!

Enjoy!

Pan-Seared Salmon with Sautéed Spinach, Mushrooms, and Leeks

Salmon is one of the many foods I hated as a kid. In fact, I really didn’t care for it at all up until about a year ago. I guess the old tastebuds are a-changin’ because now I love it. I eat it every week!

I actually did some quick research on “changing tastebuds” just to be certain that there was some validity to the notion that our tastes change from  childhood to adulthood.  First, I learned that everyone is born with a different number of tastebuds, ranging anywhere from 2,000 to 10,000.  The more tastebuds you have the more sensitive your are to flavors.  However, as we age, our tastebuds tend to dull and diminish in number.  Hence, our ability to enjoy things we perhaps were grossed out by as a kid.  (Not to mention that our palettes generally grow and mature as we grow and mature.)

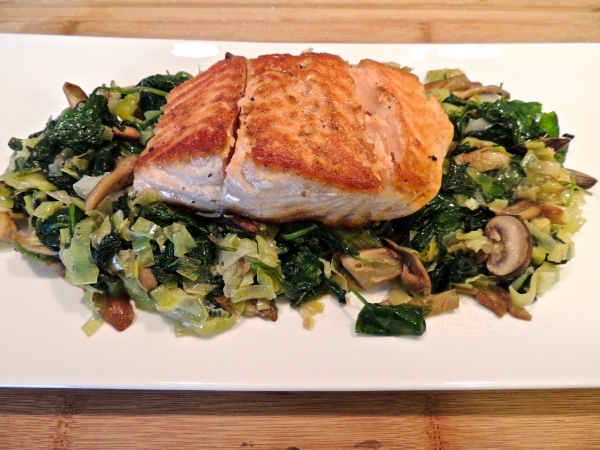
For this dish, I pan-seared some salmon and served it over a bed of sautéed spinach, mushrooms, and leeks.  If you are not familiar with leeks, they’re a member of the onion and garlic family.  You can use them in place of yellow onions in recipes and I really enjoy their mild flavor, which I usually sweeten with a little white wine when sautéing them. I LOVE to cook with them.  And you will LOVE this guilt-free meal!

Pan-Seared Salmon with Sautéed Spinach, Mushrooms, and Leeks

Pan-Seared Salmon with Sautéed Spinach, Mushrooms, and Leeks; Photo Credit: Accounting for Taste

Pan-Seared Salmon with Sautéed Spinach, Mushrooms, and Leeks; Photo Credit: Accounting for Taste

Ingredients:

  • 1 lb. filet of salmon
  • 4 c. raw spinach
  • 2 leeks
  • 8 to 12 oz. mushrooms (any kind you like)
  • 3-4 sprigs of thyme
  • 1/2 c. white wine, divided
  • salt and pepper (to taste)
  • olive oil (for sautéing)

Directions:

1. Break down the leeks in order to cook them.  Only the white and light green parts of a leek are edible.  Therefore, cut the leek just below the dark green of the leaves.  Slice the leek in half (vertically) and then chop each half of the leek into thin slivers, discarding the root of the leek.

2. Fill a large bowl at least halfway with cold water.  Add the chopped leeks to a colander and place the colander into the bowl of water.  Stir the leeks around a bit and allow them to sit for at least 5 minutes.  This will rinse the leeks and help remove any dirt from them.

Pan-Seared Salmon with Sautéed Spinach, Mushrooms, and Leeks; Photo Credit: Accounting for Taste

Pan-Seared Salmon with Sautéed Spinach, Mushrooms, and Leeks; Photo Credit: Accounting for Taste

3. While the leeks are resting and rinsing in the bowl of water, clean and chop your mushrooms.  If you bought sliced mushrooms from the grocery store, you are good to go and can skip this step!

Pan-Seared Salmon with Sautéed Spinach, Mushrooms, and Leeks; Photo Credit: Accounting for Taste

Pan-Seared Salmon with Sautéed Spinach, Mushrooms, and Leeks; Photo Credit: Accounting for Taste

4. Once at least 5 minutes have passed, removed the colander with the leeks from the bowl of water and allow them to drain for a few minutes while you continue your dinner prep.

5. Remove the skin from your salmon filet, if necessary.  Season generously with salt and pepper.

DSCN0922

6. Heat a medium sauté pan on medium-high heat.  Add 3-4 Tbsp. of olive oil. Sauté the leeks until soft and opaque. Once most of the water evaporates from the leeks, add 1/4 c. of white wine and allow to cook for 2-3 minutes.  Season with salt and pepper.  Remove from heat and set aside in a bowl.

DSCN0917

7. In the same sauté pan that you prepared the leeks, add another 3-4 Tbsp. of olive oil and sauté your mushrooms until golden brown.  When the mushrooms are almost done cooking, add 1/4 c. of white wine and allow to cook for 2-3 minutes.  Season with salt and pepper. Remove from heat and set aside in the bowl with the leeks.

DSCN0928

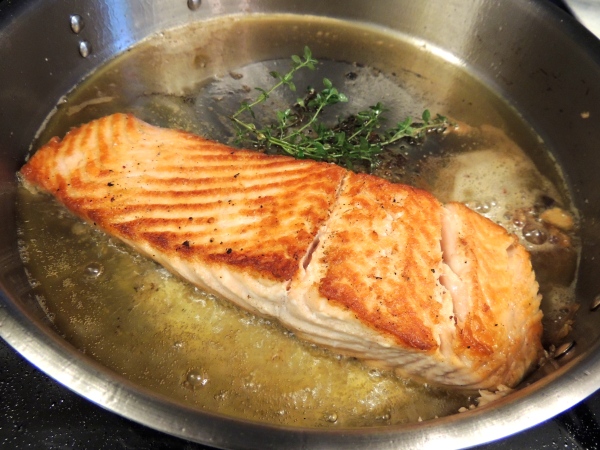
8. Just before the mushrooms are finished cooking, heat a large sauté pan over high heat.  Add 3-4 Tbsp. of olive oil and once your pan is good and hot, add the salmon.  After about 2 minutes, reduce the heat to medium.  While the first side is browning, season the other side with salt and pepper.  After another minute or two, flip your salmon over.  (It’s important to begin cooking the salmon in a very hot pan so that you get a nice sear on the fish. However, after the first two minutes or so you reduce the heat from high to medium and leave it on medium for the remainder of the cooking process, so as not to burn the fish.)

While your fish is cooking, in the medium sauté pan that you used for the mushrooms and leeks, add 2-3 Tbsp. of oil and cook the 4 c. of spinach over medium-low heat.  Once the spinach is almost ready, season with salt and pepper and add the cooked mushrooms and leeks back into the pan with the spinach so that they can reheat.

9. Once you have flipped the salmon over, add 2 Tbsp. of butter and the 3-4 sprigs of thyme.  Be careful – thyme has a tendency to spit and sputter hot oil when you add it to the pan.  Give it a few seconds to calm down a bit before approaching the pan.  Tip the pan at an angle towards you, so that all of the oil and butter forms a small pool, and spoon this oil/butter mixture over the fish as it cooks.  Do this once or twice during the span of the fish cooking.  While not necessary, it makes your fish that much more delicious.

10. Removed the cooked salmon and allow it to rest for 3-4 minutes before cutting into it.  While the fish is resting, in the medium sauté pan that you used for the mushrooms and leeks, add 2-3 Tbsp. of oil and cook the 4 c. of spinach over medium-low heat.  Once the spinach is almost ready, season with salt and pepper and add the cooked mushrooms and leeks back into the pan with the spinach so that they can reheat.

11. Once the leek, mushroom, and spinach mixture is hot, spoon a bed of it onto each plate.  Cut your salmon filet into two pieces and place each piece on top of the bed of the spinach.  Serve immediately.

Pan-Seared Salmon with Sautéed Spinach, Mushrooms, and Leeks; Photo Credit: Accounting for Taste

Pan-Seared Salmon with Sautéed Spinach, Mushrooms, and Leeks; Photo Credit: Accounting for Taste

Meatless Monday: Southwestern Stuffed Peppers

Making stuffed peppers is exciting because you are basically working with a blank canvas!  This dish is endlessly customizable.  You can stuff them with anything and everything you want!  ANY meat, ANY vegetables, and ANY rice, pasta, grains, etc.  They make the perfect “whatever’s in the cupboard/fridge” dinner option.

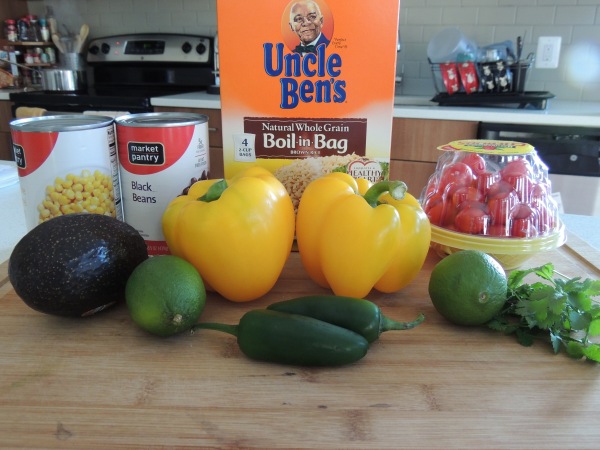
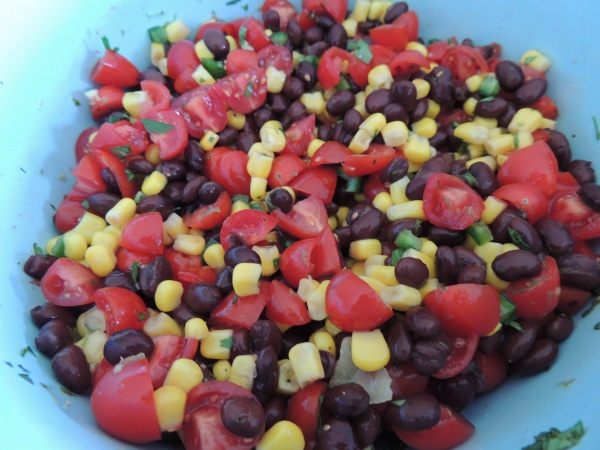
My inspiration for today was to essentially build a tortilla-less burrito.  So I filled the peppers with brown rice, black beans, diced tomatoes, diced jalapeño, corn, cilantro, and lime.  I was also craving some avocado so I decided to top the peppers with a drizzle of creamy avocado-lime ranch dressing. Lastly, I finished each pepper with a sprinkle of Mexican cheese. I also made sure to make a TON of extra salsa so that I could enjoy it throughout the week with some homemade tortilla chips. (Healthy snack! High five!)

Southwestern Stuffed Peppers

Southwestern Stuffed Peppers, Photo Credit: Accounting for Taste

Southwestern Stuffed Peppers, Photo Credit: Accounting for Taste

Ingredients

For the salsa:

  • 1 can black beans, drained and rinsed
  • 1 can corn, drained
  • 1 small container of grape tomatoes
  • 2 Tbs chopped cilantro
  • 1 lime (zest + juice)
  • 1 jalapeño
  • salt and pepper (to taste)

For the stuffed peppers:

  • 4 or 5 bell peppers (any color you like)
  • 2 cups cooked brown rice
  • 1/4 c. shredded Mexican cheese blend

For the avocado-lime ranch dressing:

  • 1 avocado
  • 1 lime (zest + juice)
  • 1/3 c. ranch dressing

Directions

To make the salsa

  1. Preheat the oven to 350 degrees.  Prepare the brown rice according to package directions.
  2. While the oven is preheating and the rice is cooking, begin to prepare the salsa.  Add the corn and black beans to a large mixing bowl.
  3. Chop up the grape tomatoes and add those to the mixing bowl as well.  (I quartered the grape tomatoes in order to get nice small chunks.)
  4. Zest and juice one lime directly into the bowl. Add the chopped cilantro. Season the mixture with salt and pepper (I used 2 pinches of salt which is probably just shy of 1 Tbsp salt and 1/4 tsp pepper).
  5. Dice 1 jalapeño pepper.  If you don’t want your stuffed peppers to be insanely spicy, make sure to remove the jalapeño seeds before you dice the jalapeño. Add this to the mixing bowl.
  6. Stir gently to combine ingredients.
Southwestern Stuffed Peppers, Photo Credit: Accounting for Taste

Southwestern Stuffed Peppers, Photo Credit: Accounting for Taste

Southwestern Stuffed Peppers, Photo Credit: Accounting for Taste

Southwestern Stuffed Peppers, Photo Credit: Accounting for Taste


To make the stuffed peppers:

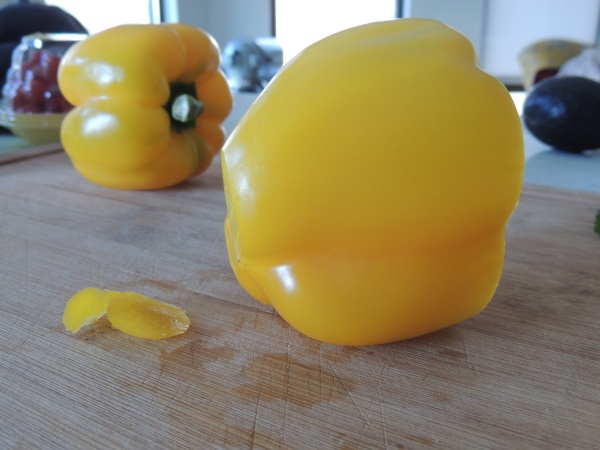
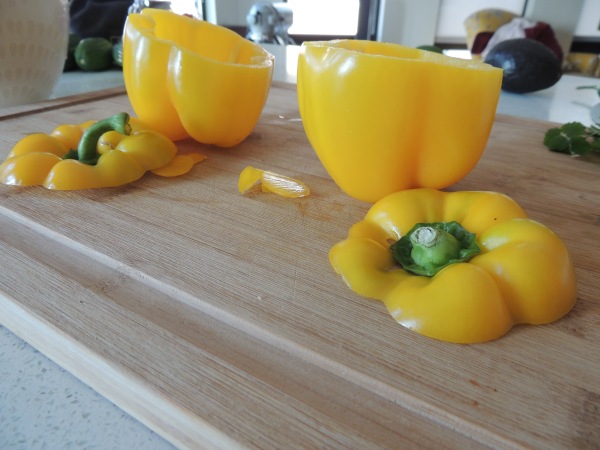
  1. Slice the top off of each pepper and remove the meat and seeds from the middle.  Then, gently cut a small sliver from the base of each pepper.  This will help the pepper sit upright without tipping over.


Southwestern Stuffed Peppers, Photo Credit: Accounting for Taste

Southwestern Stuffed Peppers, Photo Credit: Accounting for Taste

Southwestern Stuffed Peppers, Photo Credit: Accounting for Taste

Southwestern Stuffed Peppers, Photo Credit: Accounting for Taste


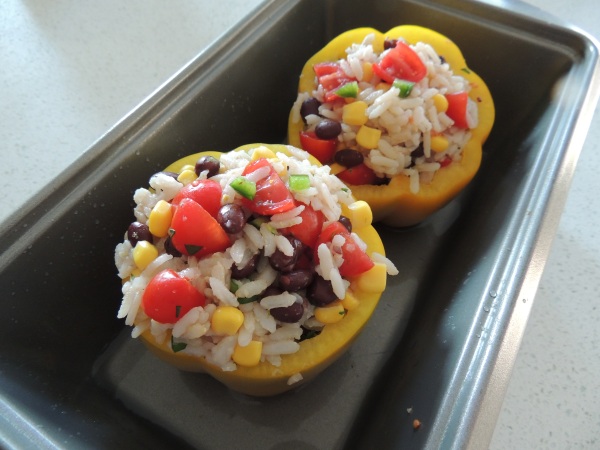
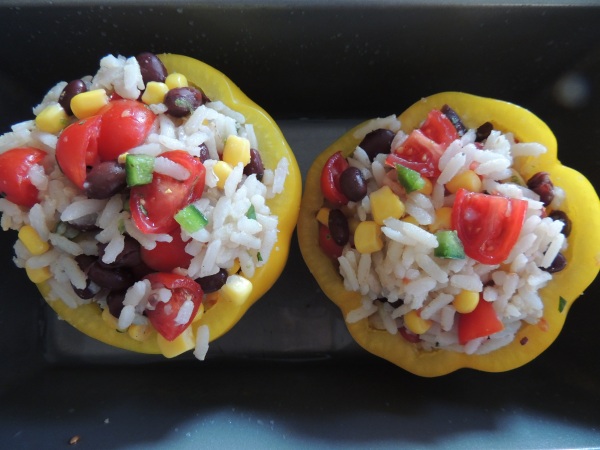
2. Prepare the filling for the peppers.  In a large bowl, combine the 2c. of cooked brown rice with 1 1/2 to 2 cups of the salsa mixture.

Southwestern Stuffed Peppers, Photo Credit: Accounting for Taste

Southwestern Stuffed Peppers, Photo Credit: Accounting for Taste

3. Spoon the filling into each bell pepper. Pack the filling tightly and add enough filling so that the pepper is well stuffed. In the bottom of a baking pan (any pan big enough to fit your peppers) add just enough water to cover the bottom of the pan.  Place the peppers into the pan and cover with foil.  Bake for 30 minutes or until peppers are cooked through.

Southwestern Stuffed Peppers, Photo Credit: Accounting for Taste

Southwestern Stuffed Peppers, Photo Credit: Accounting for Taste

Southwestern Stuffed Peppers, Photo Credit: Accounting for Taste

Southwestern Stuffed Peppers, Photo Credit: Accounting for Taste


To make the avocado-lime ranch dressing:

  1. Cut the avocado in half and scoop the meat into a food processor. Puree for 30 seconds.
  2. Add 1/3 c. of ranch dressing to the food processor with the avocado.  Blend until smooth (30-45 seconds).
  3. Pour the avocado ranch dressing into a bowl. Add the zest and juice of one lime, as well as a pinch of salt. Stir to combine.
Southwestern Stuffed Peppers, Photo Credit: Accounting for Taste

Southwestern Stuffed Peppers, Photo Credit: Accounting for Taste

Southwestern Stuffed Peppers, Photo Credit: Accounting for Taste

Southwestern Stuffed Peppers, Photo Credit: Accounting for Taste

Southwestern Stuffed Peppers, Photo Credit: Accounting for Taste

Southwestern Stuffed Peppers, Photo Credit: Accounting for Taste


To finish the peppers:

  1. Once the peppers are done cooking, remove them from the oven. Sprinkle the tops of each pepper with Mexican cheese blend.  Return the peppers to the oven for a few minutes so the cheese can melt.
  2. Once the cheese has melted, plate each stuffed pepper. (I usually serve them in bowls because once you start cutting into it, it can get a little messy!)
  3. Drizzle each pepper with avocado ranch dressing and serve. Bon appétit!

    Southwestern Stuffed Peppers, Photo Credit: Accounting for Taste

    Southwestern Stuffed Peppers, Photo Credit: Accounting for Taste